E6 Connect Home Simulator Setup That Performs
Share
A missed seven-iron that starts right and falls farther right tells you more than a bucket of range balls ever will - if your system measures it correctly and shows it without delay. An E6 Connect home simulator setup can turn a garage, basement, or dedicated room into a legitimate practice environment, but software is only one part of the result. The launch monitor, hitting area, impact screen, computer, and room dimensions all have to support the same goal: feedback you can trust at real swing speeds.
E6 Connect earns its place in serious home golf because it gives measured shots a useful context. You can practice on a range, play courses, work through skills challenges, and see ball flight immediately. But a polished course graphic cannot make up for a poor read, an unsafe screen, or a room that forces you to alter your swing. Build the physical system first. Then make the software work hard for your game.
Start Your E6 Connect Home Simulator Setup With the Room
The first question is not which projector to buy. It is whether you can make full, unrestricted swings safely. Measure the room at its usable hitting position, not from wall to wall. Ceiling lights, garage-door tracks, beams, cabinets, and a sloped ceiling can all reduce your actual clearance.
For most golfers, a ceiling height of 9 feet is the practical starting point for comfortable driver swings. Taller players and players with an upright motion may need 10 feet or more. Width matters just as much in a shared simulator room. A right-handed golfer needs clear space around the backswing and follow-through, while a room intended for both right- and left-handed players needs significantly more width or a hitting position that can move.
Depth is where many builds fail. You need room for the player, the ball, the screen, and the equipment required by your launch monitor. Some monitors sit beside the ball and need a clear view down the target line. Others sit overhead or behind the player and have different placement rules. Do not estimate this from a product photo. Confirm the monitor’s measured ball-to-screen distance, unit-to-ball distance, and any required clearance behind the tee before choosing an enclosure.
A compact room can still be a productive training room. It may be better suited to an optical monitor, a short-throw projector, and a focused range setup than to a full-size enclosure with every visual upgrade. The right build is the one that lets you swing freely and collect reliable data every day.
Choose a Launch Monitor E6 Connect Supports
E6 Connect does not measure the shot. Your launch monitor does. That makes compatibility and data quality the center of the purchase decision.
Before buying, verify that your specific monitor model supports E6 Connect, on the operating system and connection method you plan to use. Compatibility can differ by hardware version, subscription level, mobile versus PC use, and whether the monitor connects by Wi-Fi, Bluetooth, or USB. A launch monitor may work beautifully with its own app while offering more limited functionality in third-party software.
For golfers working on face-to-path control, carry distance, and strike quality, prioritize the measurements that match the work. Ball speed, launch angle, spin rate, spin axis, carry, offline distance, and apex are foundational ball-flight numbers. Club data such as club path, face angle, angle of attack, and smash factor can be valuable, but only if the monitor measures them consistently enough to guide a real change.
There is also a practical trade-off between camera-based and radar-based units. Camera systems are often strong indoor choices because they read the ball close to impact and can work in shorter rooms. Radar units can provide excellent information, but they usually need more ball flight and careful alignment. Neither category is automatically better. The room and your training priorities decide which one earns its place.
Build for Impact Before You Build for Graphics
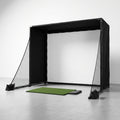
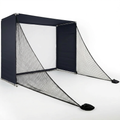
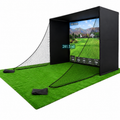
A simulator screen is safety equipment before it is a display surface. It must stop a driver-speed ball repeatedly, absorb enough energy to reduce rebound risk, and remain tight enough to produce a clean picture. A light-duty net or bargain screen can look acceptable at first, then show premature wear, excess bounce-back, or distracting wrinkles after sustained use.
Use an enclosure or a properly designed frame that protects the side and top areas around the screen. A heel strike, a high launch, or a ball that catches an edge can send a shot somewhere you did not intend. Side netting, blackout curtains, and padded protection are sensible additions, particularly in garages with tools, drywall, windows, or vehicles nearby.
The hitting mat deserves the same scrutiny. Your feet need a stable stance, and the hitting surface needs to hold a tee securely if you want to practice driver. More importantly, the mat should not punish your joints on repeated iron strikes. A quality stance mat combined with a replaceable hitting strip is often a smarter long-term approach than a single thin mat that wears unevenly.
Plan the target line before installing anything. The ball, screen center, launch monitor, projector image, and alignment marks should all agree. If the screen is visually centered but your ball position is offset, E6 Connect may still display the shot, yet your setup can feel wrong and make alignment practice less useful.
Match the Computer and Projector to the Experience You Want
E6 Connect can run in different hardware environments depending on your launch monitor and license. A mobile device may be enough for simple range sessions or a portable outdoor setup. A dedicated PC generally makes more sense for a fixed simulator room, especially when you want course play on a projector and a stable, full-size display.
Do not treat the computer specification as an afterthought. Simulation software relies on graphics processing, memory, storage, and reliable ports or wireless connectivity. If the computer only barely meets the stated requirements, course graphics may stutter, screen resolution may be limited, and the experience can become frustrating when friends are waiting to hit. A capable gaming PC with room for future updates is usually the disciplined choice for a permanent build.
Projector selection starts with the screen size and throw distance. In many home rooms, a short-throw projector keeps the unit ahead of the golfer and reduces the chance that a player blocks the light. Check the projector’s throw ratio against your exact screen width before purchase. Then account for mounting height, image offset, and whether the enclosure roof or crossbar interferes with the beam.
Brightness matters most when the room has ambient light. A basement with controlled lighting can produce a strong image with less projector output than a sunlit garage. Still, darker walls, a dark ceiling, and light control around windows usually improve both image quality and shot visibility more effectively than trying to overpower a bright room with projector specifications alone.
Treat Network and Calibration as Part of the Build
A clean E6 Connect home simulator setup needs dependable connectivity. Position the computer or tablet where it can maintain a stable connection to the launch monitor without becoming a trip hazard. If your room is far from the home router, test the Wi-Fi signal before mounting a projector or routing cables. A wired Ethernet connection for the simulator computer can remove one common source of interruptions.
Keep power protected and organized. Use surge protection for the computer, projector, monitor, and any powered screen or lighting components. Run cables away from the hitting zone, secure loose lengths, and leave enough service slack that you can move equipment for cleaning or maintenance. A simulator room should feel permanent, not like a temporary electronics project stretched across the floor.
Calibration is where the system starts telling the truth. Level the hitting surface, place the monitor exactly where its instructions require, and aim it with care. Confirm that screen center and the software target line match. Hit several normal shots with a mid-iron and compare the displayed start direction, carry, and curve to what you expect from a known strike.
Do not judge accuracy from one perfect shot or one obvious mishit. Look for repeatability across a session. If every solid shot appears to start slightly offline, fix alignment before changing your swing. If shots are inconsistent, inspect lighting, ball placement, monitor position, and network connection before assuming the software is the problem.
Use E6 Connect for Practice That Transfers
Course play is valuable because it makes you choose targets, clubs, and shot shapes under consequence. But the fastest improvement often comes from structured range sessions. Pick one stock club, establish a carry window, and track whether your strike and dispersion improve over a set of 15 to 25 balls. Then move to a different task, such as a controlled three-quarter wedge or a driver start-line drill.
Avoid turning every session into a contest to produce the longest number on the screen. When ball speed rises but smash factor, spin, and dispersion become unstable, the data is telling you that effort is outrunning control. A better home session has a defined purpose and an honest finish point.
Scoot the Green builds serious home golf around that standard: equipment should hold up to real speeds, work together correctly, and give you feedback worth acting on. When your room, monitor, impact system, and E6 Connect workflow are aligned, ten focused minutes after work can become practice that shows up on the course.