Golf Club Distance Gapping Home Practice
Share
A missed green from 155 yards is often blamed on a bad swing. Sometimes it is a bad number. If you believe your 8-iron carries 155 but your normal strike carries 147, the result is predictable: a ball that lands short, a false read on your swing, and less confidence the next time that yardage appears. Golf club distance gapping home practice gives you a way to replace assumptions with measured carry numbers.
This is not about chasing your longest shot with every club. It is about learning the distance you can expect when you make a playable swing, then building a bag with useful spacing from club to club. A credible home setup gives you the repetitions, ball-flight feedback, and consistency to make that information worth trusting.
Golf Club Distance Gapping at Home Starts With Carry
For course management, carry distance is the number that matters most. Total distance changes with fairway firmness, elevation, wind, temperature, and the way a ball lands. Carry is the distance your ball must travel to clear a bunker, reach a front pin, or cover water. Start your gapping session there.
Use the same ball model you play whenever possible. Range balls, old practice balls, and mixed bags can create misleading speed, spin, and carry results. If your home setup includes a launch monitor, make sure it is positioned correctly and has enough ball flight or measured data to deliver reliable indoor readings. A monitor that reports club and ball data consistently is more useful than a flashy feature list that leaves you questioning every shot.
Warm up before collecting numbers. Hit a few easy wedges, then several mid-irons, and work toward longer clubs. Your goal is not to manufacture speed. You want the swing you would use on the course when a score matters.
For each full-swing club, hit enough shots to see a pattern. Ten usable shots is a strong starting point for a repeatable player; 12 to 15 is better when contact varies. Remove obvious mishits only when you can identify the reason, such as a heavy strike, a thin shot, or a clear setup error. Do not remove every shot that falls short simply because it hurts the average. If slightly low-face contact shows up regularly, it belongs in the story your data tells.
Record average carry, but also pay attention to the normal range. An 8-iron that averages 150 yards but commonly falls between 145 and 154 is different from one that averages 150 with a much wider spread. The first gives you a dependable stock yardage. The second may point to inconsistent strike location, changing delivered loft, or excessive variation in speed.
Build a Gap Chart You Will Actually Use
A useful distance chart is simple enough to reference before a round and detailed enough to guide a real decision. For every club, note your stock carry and a realistic short-to-long window. Add a separate number for a controlled swing if you use one often, such as a three-quarter wedge or a flighted 9-iron.
Do not assume every club should be separated by the same number of yards. A 4- to 5-yard gap between scoring wedges may be useful. Mid-irons often produce 10- to 13-yard carry gaps, while fairway woods and hybrids can create bigger jumps. The right number depends on your speed, lofts, strike quality, and the shots you face most often.
A sample portion of a chart might look like this:
- Pitching wedge: 118-yard stock carry
- 9-iron: 130-yard stock carry
- 8-iron: 143-yard stock carry
- 7-iron: 156-yard stock carry
- 6-iron: 168-yard stock carry
Keep your chart in carry yardages, then adjust on the course for conditions. That discipline prevents a common mistake: choosing a club based on a best-case total distance and finding trouble short of the target.
Find the Gaps That Cost Shots
The most expensive gaps are rarely buried in the middle of a clean iron set. They usually appear at the top and bottom of the bag.
At the scoring end, check the actual lofts of your wedges. Modern pitching wedges can be significantly stronger than traditional designs, which may leave too much space before the next wedge. Loft stamps are a starting point, not proof of distance. A 50-degree wedge and a 54-degree wedge may create ideal spacing for one golfer and overlap for another based on delivery, spin, and strike.
At the long end, do not force a club because the set says you should carry it. If your 4-iron and hybrid produce nearly identical carry but the hybrid launches higher and lands softer, the hybrid may be the more useful green-holding option. Conversely, a player who needs a low tee shot in wind may have a legitimate reason to keep an iron that does not win every launch-monitor category.
Driver deserves its own test. Measure more than one swing intention: your normal tee shot, a controlled fairway-finder, and any shot you use on tight holes. Carry, launch, spin, and left-right dispersion matter together. More ball speed does not automatically mean a better on-course club if the added distance comes with a pattern that brings penalty areas into play.
Use Ball Flight to Explain the Number
Distance data tells you what happened. Ball-flight data helps explain why. If a club has unpredictable carry, inspect strike quality before changing your bag. Low-face contact can reduce launch and spin characteristics enough to produce short shots. Heel or toe strikes can cost ball speed and alter start direction. A few yards of lost carry across an iron set may be a contact issue, not a loft issue.
Pay attention to launch and spin trends as well. A long iron that launches too low with insufficient spin may roll out on a simulator screen but struggle to hold a real green. A wedge that spins excessively on full swings may be losing useful carry. The answer is not always new equipment. It could be ball position, dynamic loft, shaft fit, or a swing pattern worth addressing.
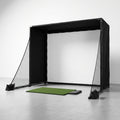
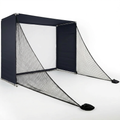
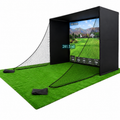
This is where serious home golf earns its keep. Repeating the same test in a garage, basement, or dedicated golf room reduces the noise created by wind, uneven range turf, and guessing at a distant landing spot. When your impact screen is built for real speeds and your monitor provides dependable feedback, you can test, adjust, and retest without wasting an afternoon driving to the range.
Retest After Any Meaningful Change
Your gapping chart is not permanent. Retest after buying clubs, changing shafts, adjusting lofts, switching ball models, or making a meaningful swing change. You should also check it at least once or twice a year. Strength, speed, and contact patterns can change more than most golfers realize.
There is a trade-off between constant testing and useful practice. Do not turn every session into a data audit. Once your yardages are established, use your home setup to practice specific distances, start lines, face control, and strike quality. Then schedule a focused gapping session when you have enough time to hit the shots properly and review the results without rushing.
If a gap looks wrong, confirm it on a second day before bending lofts or replacing a club. One session can be distorted by fatigue, poor contact, or a setup issue. A pattern that survives multiple sessions is evidence.
Scoot the Green is built around that standard: practice feedback should be accurate enough to influence real decisions, not just entertaining enough to fill an evening. Know your carry numbers, understand the windows around them, and bring a clearer answer to every yardage you face. The next time a flag sits beyond a bunker, you will not be hoping your club is right. You will know why you chose it.