How to Install Golf Impact Screen Safely
Share
A golf impact screen is the component that takes the hardest hit in your simulator. A clean-looking enclosure means very little if the screen is mounted too tight, hung too close to a wall, or installed in a room that cannot safely contain a driver shot. To install golf impact screen safely, start with the ball, the club, and the energy they create - then build outward from there.
A serious home golf setup should let you swing freely, see useful ball flight, and practice without worrying about a ricochet, a damaged wall, or a screen failure halfway through a session. That requires more than hanging fabric on a frame. It requires adequate space, correct mounting hardware, controlled screen tension, and a realistic assessment of who will use the room.
Start With the Room, Not the Screen
Measure the room before ordering or assembling anything. Ceiling height is usually the first limiting factor. Many golfers need at least 9 feet for a comfortable driver swing, while taller players or golfers with upright swings may need more. Do not judge clearance by taking a slow practice swing. Make several full-speed swings with your longest club and have another person watch the clubhead path from a safe position.
Width matters just as much. The hitting position must allow the golfer to stand centered relative to the screen, with enough space on both sides for a natural backswing and follow-through. A room that technically fits an enclosure can still feel restrictive if the hitting mat forces a player too close to a side wall.
Depth is where screen safety becomes especially important. You need room for the golfer, the hitting area, the screen, and the protected space behind it. The exact depth depends on the screen system, launch monitor, and whether your unit sits behind the ball, beside it, or overhead. Read the manufacturer’s spacing requirements for every component before deciding on a final layout.
Protect the Space Behind the Screen
An impact screen must have room to absorb energy. If it is pressed directly against drywall, concrete, shelving, or a garage door, even a durable screen can transfer impact force into the surface behind it. That can create excessive noise, screen wear, wall damage, and unpredictable rebound.
Leave the clearance specified by the screen or enclosure manufacturer. In many setups, a foot or more of open space behind the screen is a practical minimum, but some systems need more. The correct number is always the one stated for your equipment. If the room is shallow, choose a purpose-built enclosure or screen system designed for that footprint instead of eliminating the rear gap.
Remove hard objects from the impact zone and the area behind the enclosure. Tools, storage bins, workout equipment, windows, and loose furniture do not belong where a ball could reach them. If a garage must serve multiple purposes, create a dedicated simulator footprint and clear it before every hitting session.
Build a Frame That Stays Put
The frame supports the screen, but it also determines whether the enclosure remains stable under repeated impacts. Use the frame components, connectors, and anchoring method intended for the specific system. Improvising with undersized tubing, lightweight hooks, or household rope may save time on installation day, but it creates movement and failure points when balls start arriving at real driver speeds.
Assemble the frame on a level surface and square the corners before adding the screen. A twisted frame can make it difficult to achieve even tension, and uneven tension leads to wrinkles, poor projected image quality, and inconsistent ball response. Check each connection as you build. If the system uses locking pins, bolts, or set screws, verify that they are fully engaged.
Freestanding enclosures still need to be stable. Follow the manufacturer’s guidance on floor anchors, sandbags, weighted bases, or wall attachment. This matters most in garages, patios, and multipurpose rooms where someone could bump the structure while walking by. The goal is not merely to keep the frame upright. It is to prevent it from shifting toward the player or screen after thousands of impacts.
If you are mounting hardware to a wall or ceiling, fasten into structural framing or use an anchoring method rated for the load and surface. Drywall anchors alone are not a reliable solution for a screen that repeatedly absorbs struck golf balls. When you are uncertain about a wall’s construction, consult a qualified installer rather than guessing.
Hang the Screen With Controlled Tension
A screen should hang flat enough to create a clear image, but loose enough to absorb a ball without firing it back toward the hitting area. That balance is the heart of a safe installation.
Attach the screen evenly, working from the top center outward and then down each side. Most quality systems use ball bungees, straps, or other elastic connectors because they distribute force and provide controlled give. Use the recommended quantity and placement. Skipping connectors to speed up installation often creates loose corners, stress points, and gaps where a ball can pass through or strike the frame.
Do not pull the screen drum-tight. Excess tension reduces its ability to dissipate energy and increases rebound. It can also accelerate wear around grommets and attachment points. A properly installed screen will have modest, even give when you press it by hand. The exact tension varies by material and enclosure design, so follow the screen maker’s instructions instead of using a one-size-fits-all rule.
Wrinkles are not automatically a safety issue, but deep folds can affect projection and create inconsistent ball behavior. Adjust bungee placement gradually until the screen is reasonably smooth. If one area remains loose while another is overly tight, stop and inspect the frame for alignment problems rather than continuing to tension against a crooked structure.
Cover the Frame and Side Gaps
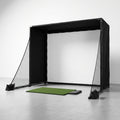
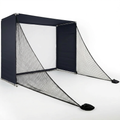
A direct strike on exposed metal tubing, corner fittings, or a hard wall can produce a fast rebound. Protective foam, side netting, curtains, and enclosure panels reduce that risk. These components are not cosmetic add-ons. They are part of the containment system.
Pay special attention to the perimeter of the screen. Golf balls do not always fly where the simulator image suggests, particularly during early sessions, with guests, or when a player hits a low heel shot or high toe shot. Side netting should overlap the impact area without leaving openings, and curtains should hang low enough to contain low line drives.
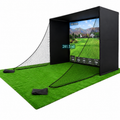
The floor deserves the same attention. Use a stable hitting mat that does not slide and position it so the ball is centered on the intended target line. A mat that creeps forward or sideways changes the golfer’s relationship to the screen and can turn a safe layout into an uncomfortable one. For serious home golf, consistent stance and ball position are part of both performance and safety.
Test Before You Hit Driver
The first shots into a new screen should not be full-speed drivers. Start with foam balls or soft tosses if the manufacturer permits, then move to short wedges at reduced speed. Watch how the screen absorbs impact, whether the frame shifts, and where the ball drops after contact.
Next, hit a few controlled shots with a wedge and mid-iron. Stand clear of the expected drop zone and never allow another person to stand beside or behind the screen while testing. Listen for unusual sounds: a sharp crack can indicate frame contact, while a heavy thud against a wall may reveal insufficient clearance behind the screen.
Only after the enclosure remains stable and the screen returns balls predictably should you move to full swings. Test with the clubs and ball speeds you actually plan to use. A screen that behaves well with a wedge may react differently to a driver strike at 150 mph or more.
Make Safe Use Part of Every Session
Installation is only the beginning. Before each practice session, inspect the screen for tears, stretched grommets, loose bungees, and signs of wear around the center impact area. Check the frame connections and confirm that side protection remains in position. Small issues are easier and less expensive to correct before they become a failed screen or a damaged room.
Set clear rules for family members and guests. One person hits at a time. Nobody stands forward of the ball or beside the enclosure. Children should not use the simulator unsupervised, even if the screen is enclosed. A launch monitor and projector add valuable feedback, but they do not replace basic awareness around a live hitting area.
Scoot the Green builds serious home golf around equipment that earns its place through repeatable practice. Give your impact screen the same standard. When the room is measured correctly, the frame is secure, and the screen has the right amount of give, you can focus on carry, face control, and the next shot - not what might happen when you make a full swing.