TGC 2026 Golf Simulator Setup That Holds Up
Share
A TGC 2026 golf simulator setup is only as useful as the shot data and impact environment behind it. A sharp projected course cannot fix a launch monitor that struggles with spin, a screen that is not built for driver speed, or a room that forces you to alter your swing. Build the feedback loop correctly and a 30-minute session at home can produce information that carries to the course.
For serious home golf, the goal is not simply to get software running. The goal is to create a repeatable place to measure carry, ball speed, launch, spin, start line, and shot shape without wondering whether the setup caused the miss. That requires matching the room, launch monitor, computer, enclosure, and software requirements before anything is mounted.
Start With the Room, Not the Screen
A simulator build begins with the dimensions you can actually use. Measure ceiling height, room width, and total depth, then measure again around beams, garage-door tracks, lights, storage shelves, and any area where a right- or left-handed player needs to swing. The usable hitting zone matters more than the biggest wall in the room.
Ceiling height is usually the first hard limit. Many adult golfers need roughly 9 to 10 feet to make a confident driver swing, though height, posture, and swing shape change that number. Do not assume you have enough clearance because a wedge clears the ceiling. Hit a few full drivers in the intended stance location before committing to an enclosure. A guarded swing delivers guarded data.
Depth determines where the golfer stands, where the ball sits, how much ball flight an overhead or camera-based system needs, and how far the screen is from the strike. Width affects both safety and whether multiple golfers can use the space comfortably. A compact room can still be productive, but it may favor a single-handed hitting position, a centered impact screen, and a monitor designed for limited-flight indoor use.
The screen should sit far enough from the ball to absorb impact safely while leaving room for a confident follow-through. The exact distance depends on the enclosure, screen material, and launch monitor specifications. Treat the manufacturer's recommended ball-to-screen distance and monitor-to-ball placement as operating requirements, not suggestions. At real driver speeds, small shortcuts become noise, bounce-back risk, and damaged equipment.
Choose a Launch Monitor for the Data You Need
Your simulator software can only display what the launch monitor captures. That makes the monitor the performance center of a TGC 2026 golf simulator setup.
A radar-based unit can be an excellent fit when the room provides sufficient ball flight and the installation supports its required alignment. Camera-based and photometric units are often better suited to tighter indoor rooms because they measure the ball close to impact. Overhead systems keep the floor clear and can be especially practical for households with both right- and left-handed golfers, but they demand careful mounting height, leveling, and hitting-area alignment.
The right decision depends on your room and practice goals. If your priority is reliable carry distance, ball speed, launch angle, and spin for structured practice, choose a unit with proven indoor measurement performance. If you are working on face-to-path relationship, spin axis, and start direction, confirm the monitor provides the ball and club data needed to diagnose those patterns. Do not pay for a long data list you will never use, but do not buy a system that leaves you guessing about the miss you are trying to fix.
Compatibility needs the same level of attention. Verify that the specific launch monitor, connection method, software license, and computer operating system support the TGC 2026 platform you plan to run. Software ecosystems, subscriptions, and supported-device lists can change. Confirm current requirements before purchase, especially if you are building around an existing PC or monitor.
Give the Computer Enough Headroom
Simulator software asks more from a computer than a spreadsheet or streaming video. It must receive shot data, render a course, run the display at a useful resolution, and do it without distracting delay. Low latency matters because feedback has to match the swing you just made. If the ball flight appears late or stutters, practice loses its rhythm.
Use the current published system requirements as the baseline, then build above the minimum where the budget allows. A dedicated Windows PC with a capable graphics card, adequate memory, fast storage, and reliable wired connectivity is generally the safer choice for a permanent indoor build. Minimum specifications may launch the software; they do not always deliver the clean visuals and stable performance expected from a serious simulator.
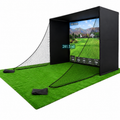
Plan the display system at the same time. A short-throw projector is common because it can fill a screen without placing the unit deep in the room, but its throw ratio, mounting position, brightness, and aspect ratio must match the enclosure. Projectors mounted in a golfer's sightline can create shadows. Floor-mounted units need protection. A large TV is simpler in some compact practice rooms, though it does not replace a true impact screen.
Cable routing deserves more planning than it gets. Use protected paths for power, HDMI, network, and launch-monitor connections. Keep cables away from the hitting zone and places where a ball can strike them. A clean install is easier to service, safer for family use, and less likely to create intermittent connection problems during a session.
Build an Impact Area for Real Speeds
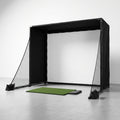
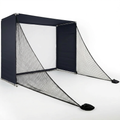
An impact screen is not a decorative backdrop. It is a safety component that takes repeated high-speed impacts. Select a screen and enclosure designed for the ball speeds you expect to produce, then install it with the tension and spacing specified for that material.
Too much tension can increase bounce-back. Too little can create excessive wrinkles, poor image quality, and contact with the wall behind the screen. The proper amount of setback behind the screen gives it room to dissipate energy. Side netting, protective padding, and enclosure walls contain the shot that starts offline, which will happen even in a well-built setup.
Your hitting mat matters just as much. A mat that slides, compresses unpredictably, or punishes shallow strikes can distort practice and irritate wrists or elbows. Look for stable footing, enough thickness to match the surrounding floor height, and a hitting surface that lets you replace the strike section when it wears. If you use a tee, confirm the mat accepts it at the height you need for driver practice.
This is where cheap components often cost more over time. A durable enclosure, screen, and mat protect the expensive technology around them and keep the room usable after thousands of shots. Scoot the Green approaches serious home golf around that full system, because accurate data is not much help when the infrastructure cannot handle daily use.
Calibrate Before You Chase Numbers
Once everything is installed, resist the urge to jump straight into a virtual round. First, level and align the launch monitor according to its instructions. Mark the hitting location so the ball is positioned consistently. Set the correct elevation, handedness options, hitting-surface parameters, and any available environmental settings.
Then validate the setup with clubs you know well. Hit several shots with a wedge, mid-iron, and driver. Look for believable carry-distance gaps, reasonable launch windows, and consistent shot direction. One swing is not a test. A pattern across 10 to 15 well-struck shots tells you more about whether the system is reading correctly.
If results look wrong, solve setup variables before diagnosing your swing. Check ball position, monitor alignment, room lighting where applicable, reflective surfaces, firmware, software updates, and connection stability. Indoor golf rewards disciplined troubleshooting. Changing three settings at once only makes the source of the problem harder to find.
Turn Simulator Time Into Better Golf
Course play keeps home golf enjoyable, but practice modes are where the setup earns its place. Give each session a job. One day might focus on starting a 7-iron closer to the target line. Another might compare carry distance and spin with three wedge swings. A driver session may be about tightening dispersion rather than chasing one maximum ball-speed number.
Use the same ball type when possible, especially when tracking spin and distance. Establish a baseline with your normal swing before making a change, then work in small blocks. If you adjust grip pressure, ball position, or swing feel, compare the averages rather than reacting to a single perfect shot. Data you trust becomes useful only when your process is repeatable.
A well-planned simulator room should make practice easier to start. Leave the mat ready, the computer updated, and the hitting area clear. When a short session has no setup friction, it is far more likely to happen after work, before a weekend round, or during bad weather.
The best final test is simple: stand in the hitting area with a driver, make your normal swing, and trust what the system tells you. When the room is safe, the measurements are credible, and the ball flight responds without delay, every session has a chance to earn its way onto the scorecard.