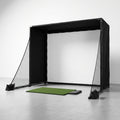
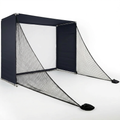
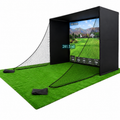
Golf Simulator Room Layout That Works at Real Speeds
Share
A golf simulator room layout succeeds or fails before the first ball is hit. A launch monitor can deliver serious data, a screen can be built for real speeds, and software can show every yard of carry. But if the hitting position is cramped, the ceiling interferes with a driver swing, or the screen is too close to the ball, practice becomes compromised before the feedback loop even begins.
The goal is not simply to fit a simulator into an available room. The goal is to create a repeatable hitting environment where you can swing freely, trust the numbers, and practice often enough for the work to show up on the course.
Start With the Swing Zone, Not the Screen
Most layout mistakes start with the screen. It is the most visible part of the build, so it is tempting to place it against the biggest wall and work backward. Serious home golf works the other way around: establish a safe swing zone first, then place the screen, launch monitor, flooring, and seating around it.
Your swing zone needs enough width for the club to move naturally, enough depth for the ball-to-screen distance required by your system, and enough ceiling height to let you make your normal driver swing. Those dimensions are connected. A room may look large until you account for a golfer standing behind the ball, a launch monitor sitting behind or beside the hitting area, and a screen that needs clearance from the back wall.
For a right-handed golfer using driver, a practical target is a room at least 14 feet wide, 18 feet deep, and 10 feet high. More space is better, particularly if the room will serve right- and left-handed players. A 12-foot-wide room can work for a single golfer, but it demands careful centering and an honest swing test. A 9-foot ceiling may work for many players, yet it is not automatic approval for driver use. Height, swing plane, player build, and comfort level all matter.
Before ordering equipment, stand in the intended hitting area with your longest club. Make slow practice swings, then full swings if the room is safe and clear. You are checking more than whether the club contacts a surface. You are checking whether you can swing without protecting yourself from a wall, light fixture, soffit, garage-door track, or low ceiling. A guarded swing produces guarded data.
Build the Golf Simulator Room Layout Around a Centerline
Once the swing zone is confirmed, establish a centerline from the middle of the impact screen through the ball position and back toward the golfer. This line is the backbone of the golf simulator room layout. It protects visual alignment, makes screen images feel natural, and helps certain launch-monitor systems capture the ball properly.
The ball does not always need to sit exactly at the room’s physical center. In a one-handed setup, it may be shifted to create more trail-side clearance. The important point is that the golfer, ball, target line, and screen work as one system. Do not shift the tee position for furniture convenience and assume software can correct a poorly planned room.
Screen width should match the room and your intended aspect ratio. A larger screen is more immersive, but only when the room supports it. In a narrow space, an oversized screen can leave too little side clearance, forcing the ball position too close to a wall. A slightly smaller enclosure with a centered, confident swing is better than a wall-to-wall screen that turns every driver into a cautious move.
Depth matters just as much. You need enough distance from ball to screen for safe impact and realistic projected flight, plus the manufacturer-required distance for your launch monitor. Camera-based units may need a defined space between the device and ball. Radar-based units typically need more room behind the player and a clear view of the ball flight area. Measure according to the specific unit, not a generic simulator diagram.
Plan for impact, not just projection
An impact screen should have room to absorb the shot. If it is mounted too tightly against a wall, the ball can rebound harder, screen noise rises, and the system takes more abuse. Allow clearance behind the screen and use an enclosure, padding, or protective material appropriate for the available depth.
The screen should also be tensioned correctly. Too loose, and it wrinkles or sags. Too tight, and it can increase bounce-back. The right setup is one that displays a clean image while managing shots struck at driver speed.
Choose a Layout for How the Room Will Be Used
A dedicated golf room and a shared family space should not be planned the same way. The right design depends on how often the room changes purpose and how much setup friction you will tolerate.
Dedicated room
A permanent enclosure, fixed projector, integrated turf, and a stationary launch monitor create the best daily-practice environment. The room is always ready, which matters more than most golfers expect. Ten focused minutes working on face-to-path relationship, launch, or strike quality is valuable only when getting started does not require moving furniture and recalibrating equipment.
This setup also allows a proper hitting strip, putting surface, side protection, and storage for clubs and balls. If score improvement is the priority, permanence supports consistency.
Garage or basement
Garages often offer useful width and depth, but they introduce door tracks, concrete floors, temperature swings, and vehicle access. A garage layout may need a retractable screen or enclosure, plus a portable or roll-up putting surface. Plan heating, cooling, and humidity control if electronics and turf will remain installed year-round.
Basements can be quiet and convenient, but ceiling height is often the deciding factor. Do not assume a room is suitable because an iron clears comfortably. Test the clubs you actually use, especially driver and fairway wood. A basement that is ideal for putting, wedges, and iron data may not be the right place for full driver practice.
Multipurpose spare room
A spare room benefits from a compact, deliberate layout. Use a retractable screen or impact net only if it can be deployed consistently and safely. Keep the hitting mat aligned with floor markers so the ball returns to the same location every session. A repeatable setup is what lets carry, spin, club path, and smash factor mean something over time.
Make Handedness a Design Decision Early
If both right- and left-handed golfers will use the simulator, decide that before selecting the screen size, mat, and launch monitor position. A centered ball location with enough room on both sides is the cleanest solution, but it requires additional width.
A single-handed layout can offset the hitting area toward one side of the room, gaining valuable clearance where the golfer needs it most. That is an efficient choice for a committed individual golfer. It becomes a problem only when the room is expected to serve guests or family members with the opposite handedness.
Do not solve a width problem by asking golfers to stand too close to side walls. Clubhead speed is real, and so is the cost of a damaged club, wall, or person. Side netting, padded surfaces, and enclosure walls are worthwhile safeguards, but they do not replace usable swing clearance.
Give the Floor the Same Attention as the Screen
The hitting mat affects every shot. A mat that slides, sits unevenly, or punishes steep contact can turn productive practice into a source of bad habits or sore joints. The finished hitting surface should sit level, feel stable under your feet, and provide a realistic, replaceable hitting strip where the club enters the turf.
A common layout uses a dedicated stance mat with an inset strip at the same height. This prevents the ball from sitting above or below your feet and gives you a consistent strike point. If you add a putting surface, keep the transition flush enough that it does not become a tripping edge or change the feel of your stance.
Think about ball containment as part of the flooring plan. Golf balls will roll, ricochet, and collect behind the hitting area. A simple return path or open floor zone makes practice faster. Spending two minutes chasing balls after every short session is exactly the kind of friction that reduces use.
Control Light, Sound, and Heat
Projector image quality depends on light control. Bright windows, exposed garage openings, and overhead fixtures aimed at the screen can wash out the picture. Use controllable lighting and place fixtures so they illuminate the hitting area without creating glare on the screen or interfering with camera-based tracking.
Sound deserves equal attention, especially in homes with bedrooms or living areas nearby. Impact screens, driver strikes, and balls hitting enclosure padding create more noise than many first-time builders expect. Carpet, acoustic panels, insulated walls, and properly tensioned screen material can reduce noise, though no simulator room is silent at full speed.
Finally, plan power and connectivity before turf is installed. You may need outlets for a projector, launch monitor, computer, display, lighting, and charging. A strong Wi-Fi signal or hardwired connection helps software sessions run reliably. Hide cables where possible, but keep essential equipment accessible for service and adjustments.
Test the Layout Before You Finish It
Use painter’s tape to mark the screen line, ball position, enclosure footprint, and launch monitor location. Set a temporary mat in place. Then hit shots with the clubs you intend to practice most. This is where you learn whether the ceiling feels close, whether the screen distance looks right, and whether your monitor has a clean reading zone.
Scoot the Green approaches serious home golf as a complete practice system because every component affects the next one. Accurate measurement is only useful when the golfer can repeat the same swing in a safe, believable environment.
Build the room around the swing you want to trust. When the space lets you make a full move, see honest ball flight, and return tomorrow without resetting the room, your practice finally has a chance to earn its keep.