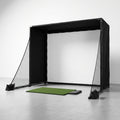
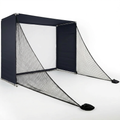
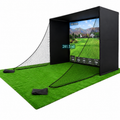
Impact Screens Built for Real Driver Speed
Share
A golf simulator can have excellent ball data and sharp software graphics, but the experience still falls apart if the impact screen is loud, ripples badly, or cannot safely handle a driver. Impact screens are the part of your setup that take the physical hit on every swing. Choose well, and each shot delivers believable ball flight, controlled rebound, and a practice environment you can use day after day.
For serious home golf, the screen is not a decorative projection surface. It is safety equipment, visual equipment, and a durability decision wrapped into one purchase. That is why the cheapest screen is rarely the best value for a garage, basement, or dedicated golf room.
What an Impact Screen Actually Does
An impact screen receives the ball after launch, absorbs its energy, and provides a surface for projected simulator visuals. It sits at the center of the feedback loop: your launch monitor measures the strike, the software calculates the shot, the projector displays the ball flight, and the screen safely handles the real ball.
That sounds simple until you consider the force involved. A driver can send a ball into the screen at high speed, often hundreds of times per week in a committed practice environment. A screen that is too light, too tightly tensioned, or poorly supported can create harsh rebound, excess noise, premature wear, or damage to the area behind it.
The screen also shapes what you see. If it has deep wrinkles, visible seams, or too much bounce after impact, the picture becomes less convincing and your hitting bay feels less finished. A good screen lets the visual feedback and the physical strike work together. You see the shot immediately, hear a controlled impact, and move to the next ball without wondering whether the setup can take it.
Screen Material Matters More Than Marketing Terms
Most serious impact screens use tightly woven polyester-based material designed to absorb repeated golf-ball impact while maintaining a clean projection surface. Construction, weave density, thickness, and finishing all affect how a screen performs. Product names can be useful, but the questions underneath them matter more.
First, ask whether the material is rated for real driver-speed use. A screen intended for foam balls, lightweight practice balls, or occasional wedge shots is not the same as one built for repeated full-speed play. If multiple golfers will use the space, or if you expect regular simulator rounds and range sessions, durability should move ahead of a small upfront savings.
Second, consider image quality. A bright white surface can make projected graphics look crisp, but brightness alone is not the goal. The screen needs enough opacity to prevent distracting light bleed from behind, while still managing impact effectively. A quality projection surface helps you read simulator feedback quickly, especially in rooms where you cannot eliminate every source of ambient light.
Finally, think about sound. Every screen makes noise when struck. The goal is not silence. The goal is a controlled, muted impact instead of a sharp crack that turns a 30-minute practice session into a household issue. Material, tension, the air gap behind the screen, and the enclosure all influence sound.
Why Rebound Is a Safety Issue
The ball has to lose its energy somewhere. If the screen is stretched too tight, it can behave more like a trampoline, sending the ball back toward the hitting area with more speed than you want. If it is too loose, it may sag, wrinkle, or interfere with projected image quality. The right installation finds a controlled middle ground.
For most home golf builds, the screen should have room to move backward on impact. That movement helps absorb energy. A proper frame or enclosure holds the screen in position without pulling it drum-tight, and the area behind the screen should be clear of hard walls, shelves, windows, and equipment that could be damaged.
This is also why an impact screen is not a complete safety system by itself. Side netting, a ceiling panel or enclosure roof, padded framing, and adequate depth all serve a purpose. Mishits happen. A heel strike, a high wedge, or a shot from a newer golfer can test the edges of the bay faster than a center-face drive ever will.
Choosing the Right Size for Your Room
A larger screen creates a more immersive simulator image and gives you more usable margin for shot dispersion. But size has to fit the room, the hitting position, and the projector plan. Buying the largest possible screen without accounting for depth and mounting space often creates a setup that looks impressive on paper but feels compromised in use.
Start with the width and height of the opening you can safely build. Then account for the frame, enclosure material, side protection, and screen attachment points. Your visible projected image will be smaller than the outer dimensions of the full enclosure, so do not confuse the two.
Depth is equally important. You need enough space for the golfer to swing freely, for the ball to travel to the screen, and for the screen to deflect backward without contacting a wall. Taller golfers and players with longer drivers need additional clearance overhead and behind the hitting position. If the room is tight, a professional-looking full bay may not be the right answer. A more compact screen with thoughtful side protection can be safer and more usable than forcing a large enclosure into inadequate space.
Room shape matters as well. A centered screen may not mean a centered hitting position if your launch monitor has specific placement requirements. Camera-based and radar-based systems can demand different distances from ball to screen and ball to unit. Plan the screen as part of the full system, not as an isolated purchase.
Tension, Flatness, and the Projected Image
A flat screen produces a cleaner picture. That is obvious when the projector is on, but flatness also affects how premium the entire simulator feels. Loose waves and deep creases catch light differently, making fairways, putting surfaces, and on-screen data harder to read.
The trade-off is that perfect visual tension is not always ideal for impact absorption. A screen mounted too tightly may look excellent before the first swing but create more rebound and stress the material over time. Many serious builds use attachment methods that allow for adjustment, so the screen can be tuned after installation rather than permanently fixed at one tension level.
Give the screen time to settle after hanging it. Fabric can relax, and minor wrinkles may improve with proper tensioning and normal use. Do not use aggressive heat or improvised methods that could damage the fibers. If the screen remains visibly uneven, inspect the frame, attachment spacing, and whether the material is being pulled consistently around the perimeter.
Protect the Parts Around the Screen
A durable screen does not make exposed hardware safe. The frame, bungees, connectors, and surrounding walls should be positioned or padded so a deflected ball cannot find a hard edge. This matters most near the bottom corners, where low shots and bounce-back can be unpredictable.
Keep the bottom of the screen close enough to the hitting surface to prevent balls from rolling underneath, while allowing enough freedom for impact deflection. If your setup includes a turf mat, make sure the transition between mat, floor, and screen does not create a hard channel that sends balls back toward the player.
Projector placement deserves the same discipline. Short-throw projectors reduce shadows in many rooms, but they still need protection from direct hits and a mounting position that avoids interference with the golfer's swing. Cables should be secured and routed away from feet, balls, and moving enclosure components.
When a Premium Screen Is Worth It
A premium impact screen makes the most sense when your setup will see frequent full-speed use, serve multiple players, or function as a permanent room feature. It is also a stronger investment when you care about simulator leagues, accurate visual feedback, and a polished image for friends or family members using the bay.
A more basic option can make sense for occasional practice, temporary outdoor setups, or golfers still validating their available space. Just be honest about the use case. If you know you will hit driver several nights a week through winter, building around an entry-level screen may simply delay the cost of upgrading.
Scoot the Green approaches serious home golf as a complete practice system: launch data, safe impact infrastructure, reliable visuals, and a hitting space you will actually use. Compatibility between those pieces is where a setup earns its keep.
Care That Extends Screen Life
Inspect the screen regularly for thinning spots, tears, loose stitching, and wear near attachment points. Rotate or adjust the screen only if its design and mounting method allow it, and replace damaged components before a small issue becomes a safety concern. Keep golf balls clean, too. Dirt, grit, and marker residue can transfer to the screen and gradually affect its appearance.
Avoid hitting visibly cut or cracked balls into the screen. A damaged ball can behave unpredictably and may snag or stress fabric more than a clean, intact ball. When the room is not in use, keep pets, tools, and stored items away from the screen surface.
The best impact screen is the one that lets you swing with commitment. Build enough space around it, pair it with the right enclosure and launch monitor, and give it the respect you would give any piece of equipment responsible for taking every full-speed shot.